If you want a practical ESP32 weather display project, this one is worth studying because the code stays close to the real job. The repo is here: CrowPanel-ESP32-4.2-E-Paper-Display-with-OpenWeatherMap-One-Call-3.0-Data-. The weather API docs are here: OpenWeather One Call API 3.0. The hardware base is an Elecrow CrowPanel ESP32 4.2-inch e-paper display.
The sketch in Weather_New_4.0.ino follows a clean cycle: connect to Wi-Fi, sync local time with NTP, call OpenWeather One Call 3.0, parse a small set of high-value fields, render the e-paper UI, and sleep for 15 minutes. That sequence is what makes the project useful as a build pattern.
1. Define the appliance inputs in code
The sketch starts by fixing the operating context: network, API key, location, timezone, refresh interval, and clock format.
const char* ssid = "yourwifissid";
const char* password = "yourwifipassword";
String openWeatherMapApiKey = "youropenweathermaponecall3.0key";
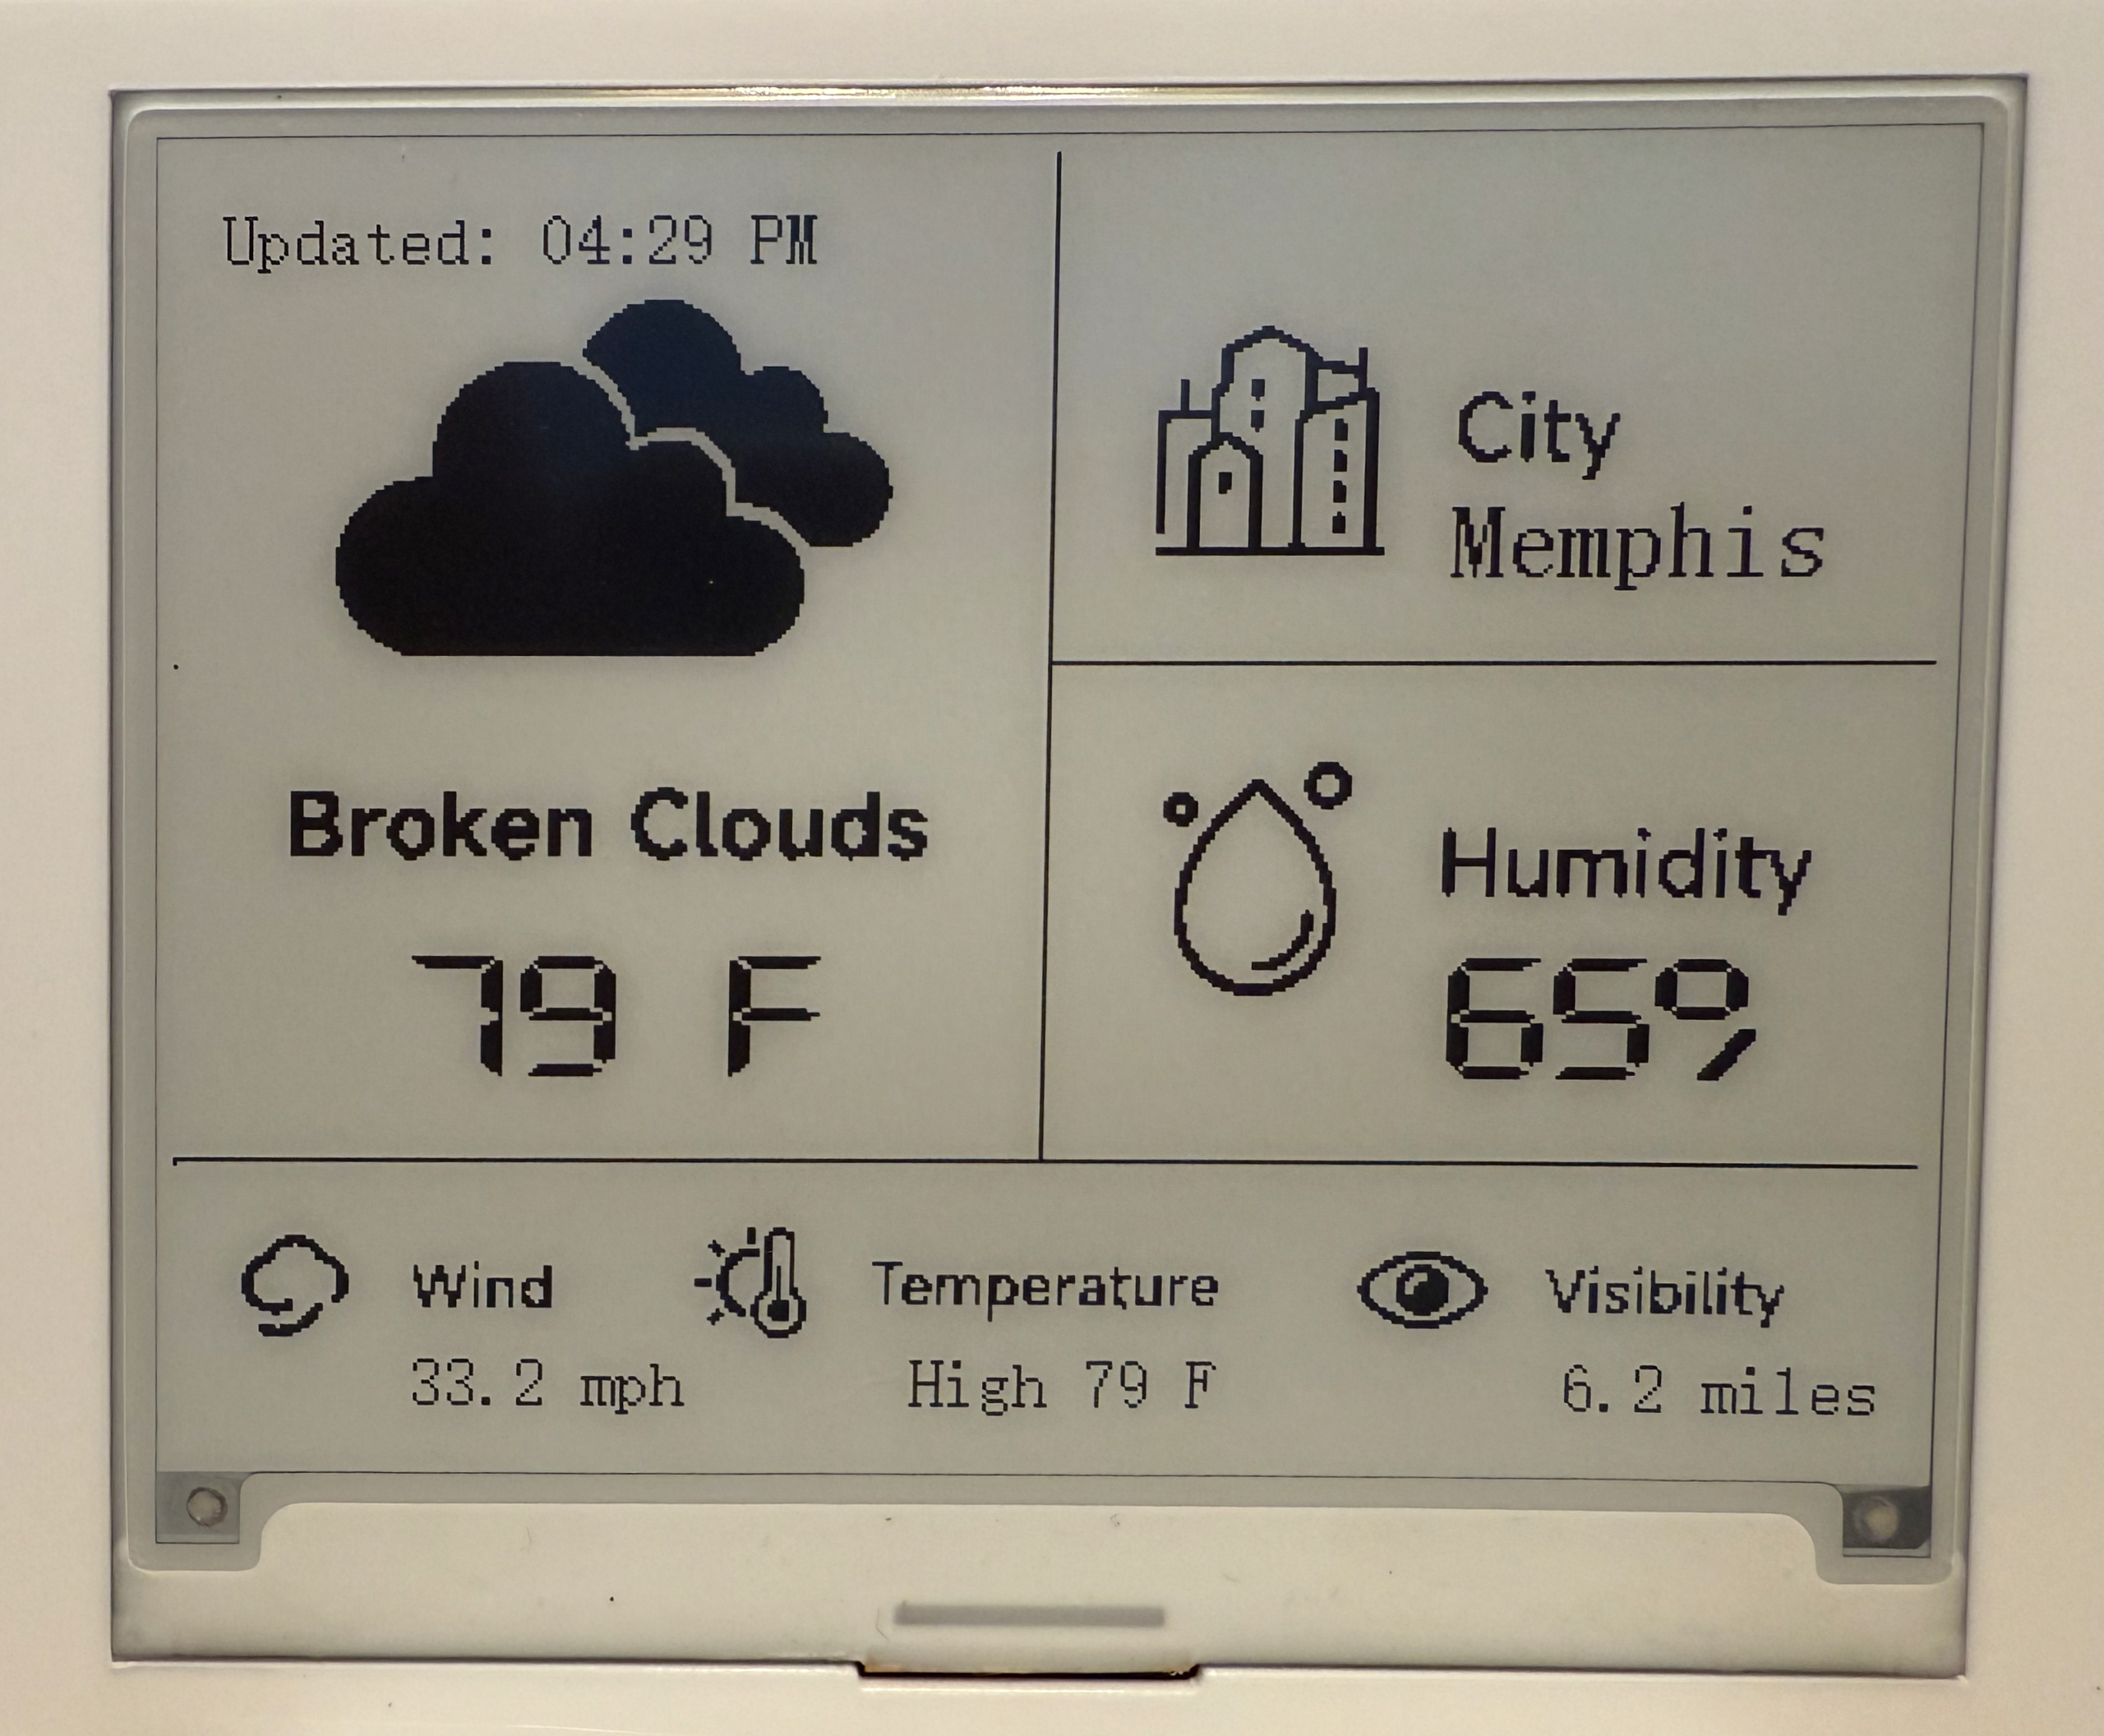
const char* CITY_NAME = "Memphis";
const char* LAT = "35.1495";
const char* LON = "-90.0490";
const char* TZ_INFO = "CST6CDT,M3.2.0/02:00:00,M11.1.0/02:00:00";
const uint32_t UPDATE_INTERVAL_MINUTES = 15;
const bool USE_24_HOUR_FORMAT = false;This gives the board a permanent home, a stable local clock, and a firmware footprint that stays simple enough to flash and mount without a setup menu.
2. Sync time before you draw the screen
The NTP setup is simple and worth copying.
configTzTime(TZ_INFO, "pool.ntp.org");

time_t now = time(nullptr);
while (now < 8 * 3600 * 2) {
  delay(500);
  now = time(nullptr);
}
That wait loop gives the screen a real Updated: time and keeps bogus startup timestamps off the panel. For a household weather panel, that detail matters.
3. Build one compact One Call request
The One Call API 3.0 docs describe the endpoint like this:
https://api.openweathermap.org/data/3.0/onecall?lat={lat}&lon={lon}&exclude={part}&appid={API key}
The project uses the endpoint in a disciplined way:
String serverPath =
    String("https://api.openweathermap.org/data/3.0/onecall?lat=") + LAT +
    "&lon=" + LON +
    "&exclude=minutely,hourly,alerts"
    "&units=imperial"
    "&appid=" + openWeatherMapApiKey;
According to the official docs, One Call 3.0 provides current weather plus forecast data, supports daily forecasts out to 8 days, and updates every 10 minutes. This sketch requests exactly what the panel needs and trims the rest.
That exclude= list is a meaningful design choice. It keeps the response smaller and keeps the display focused on the few values the screen is built to show. A more safety-oriented version would likely keep alerts and add a dedicated warning state.
4. Retry with backoff when the network misbehaves
The fetch logic uses retries with exponential backoff.
const int MAX_RETRIES = 5;
int retryCount = 0;

do {
  jsonBuffer = httpGETRequest(serverPath.c_str());
  myObject   = JSON.parse(jsonBuffer);

  if (httpResponseCode != 200) {
    retryCount++;
    if (retryCount >= MAX_RETRIES) {
      return;
    }
    uint32_t backoffMs = 2000UL * (1UL << min(retryCount - 1, 4));
    delay(backoffMs);
  }
} while (httpResponseCode != 200 && retryCount < MAX_RETRIES);
That solves the most common field failure in small connected devices: a flaky network cycle. A missed refresh is tolerable. A board that hangs forever becomes a maintenance problem.
5. Parse only the fields the display actually uses
The parsing block is compact and clear.
weather  = String((const char*) myObject["current"]["weather"][0]["main"]);
int w_id = int((double) myObject["current"]["weather"][0]["id"]);
humidity = JSON.stringify(myObject["current"]["humidity"]);

double mph = double(myObject["current"]["wind_speed"]) * 2.23694;
wind_speed = String(mph, 1);

double vis_m  = double(myObject["current"]["visibility"]);
double vis_mi = vis_m * 0.000621371;
visibility    = String(vis_mi, 1);

double t = double(myObject["current"]["temp"]);
temperature = String(int(round(t)));

t = double(myObject["daily"][0]["temp"]["max"]);
maxtemp = String(int(round(t)));
Each piece has a job: – weather and w_id drive the icon and label – humidity, temperature, and maxtemp fill the main readings – visibility becomes miles for an imperial display – daily[0].temp.max supplies a useful High field without a second API request
There is also a valuable technical caveat here. OpenWeather’s docs say current.visibility is in meters, so the meters-to-miles conversion makes sense. The same docs say current.wind_speed arrives in miles/hour when units=imperial is set. This sketch still multiplies wind speed by 2.23694, which looks like a cleanup target. If you build from this repo, verify a sample response and likely remove that extra conversion.
6. Compress the weather codes into a small icon set
The sketch maps OpenWeather condition IDs into a handful of local icon categories.
if      (w_id >= 200 && w_id < 300) weather_flag = 2;
else if (w_id >= 300 && w_id < 600) weather_flag = 5;
else if (w_id >= 600 && w_id < 700) weather_flag = 4;
else if (w_id >= 700 && w_id < 800) weather_flag = 0;
else if (w_id == 800)               weather_flag = 3;
else if (w_id > 800 && w_id < 900)  weather_flag = 1;
else                                weather_flag = 0;
That keeps the UI simple and readable. A small display benefits from a tight icon vocabulary.
7. Draw the layout explicitly
The UI code uses fixed positions for each field.
snprintf(buffer, sizeof(buffer), "%s F", temperature.c_str());
EPD_ShowString(53, 171, buffer, 48, BLACK);

snprintf(buffer, sizeof(buffer), "%s%%", humidity.c_str());
EPD_ShowString(290, 171, buffer, 48, BLACK);

snprintf(buffer, sizeof(buffer), "%s mph", wind_speed.c_str());
EPD_ShowString(54, 273, buffer, 16, BLACK);

snprintf(buffer, sizeof(buffer), "%s miles", visibility.c_str());
EPD_ShowString(320, 273, buffer, 16, BLACK);
This solves the hierarchy problem cleanly: temperature gets the most weight, supporting values stay visible, and the panel works as a glanceable screen for a door, kitchen, or workshop.
8. Sleep after every refresh
The main loop ends the way a project like this should.
js_analysis();
UI_weather_forecast();

uint64_t sleepTimeUs = UPDATE_INTERVAL_MINUTES * 60ULL * 1000000ULL;
esp_sleep_enable_timer_wakeup(sleepTimeUs);
esp_deep_sleep_start();
That power model is a big part of the project’s engineering fit. The ESP32 wakes, does one cycle of useful work, updates the screen, and goes quiet again.
One more implementation detail worth keeping in view
The HTTPS helper uses WiFiClientSecure with setInsecure():
WiFiClientSecure client;
client.setInsecure();
HTTPClient http;
http.begin(client, serverName);
httpResponseCode = http.GET();
That keeps the networking code short and straightforward on an ESP32. It also marks the next engineering pass clearly: stronger certificate validation and safer secret handling.
This repo is valuable because it gives you a working pattern you can actually extend. Keep the fixed-location model, the compact One Call request, the retry loop, and the fetch-render-sleep cycle. Then tighten the security path, revisit the wind-speed conversion, and decide whether alerts belong on the screen for your own geography.